- See the following.
1. Print the dot position adjustment pattern.
(The size of the pattern to be printed is approx. 300 mm (feed) x 400 mm (width))
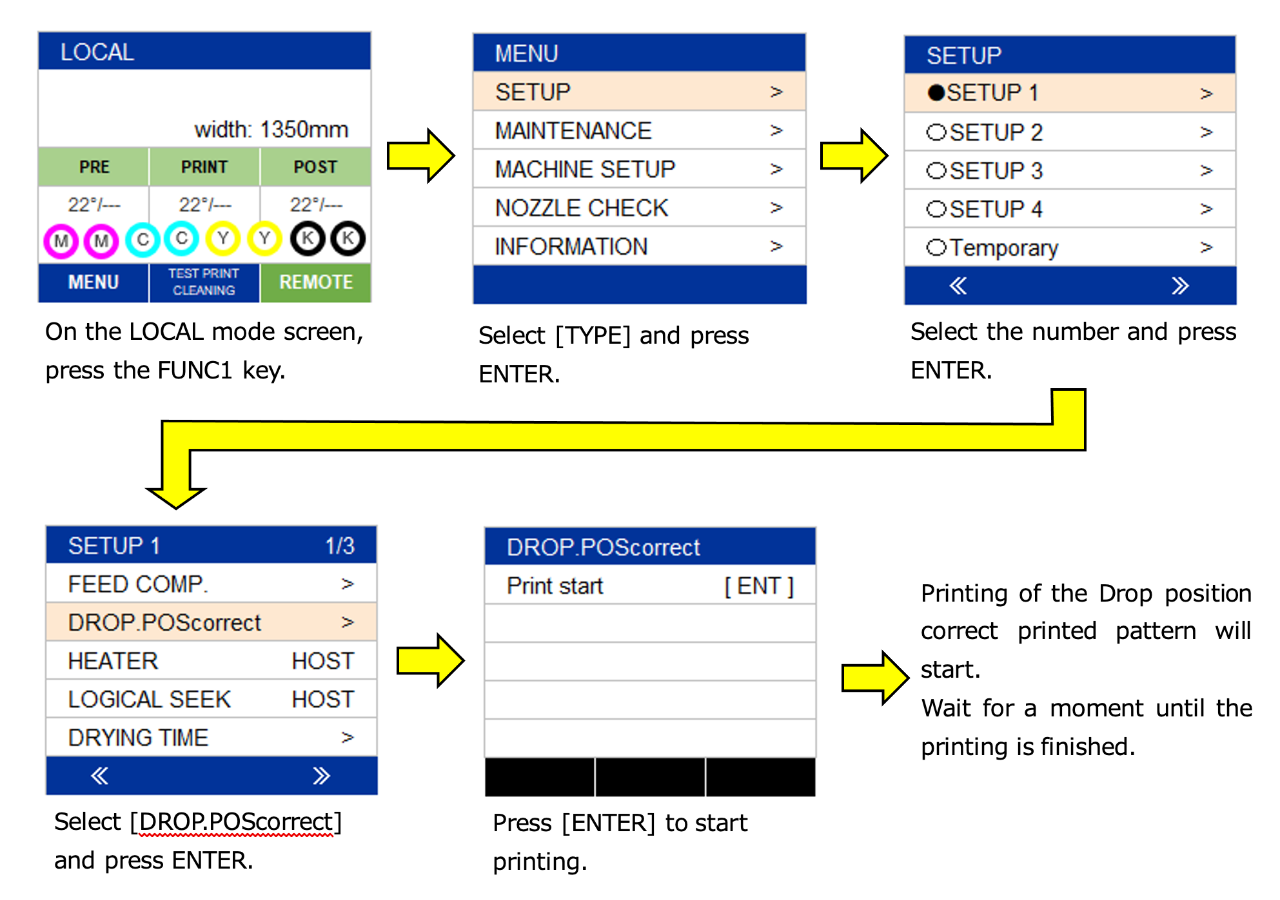
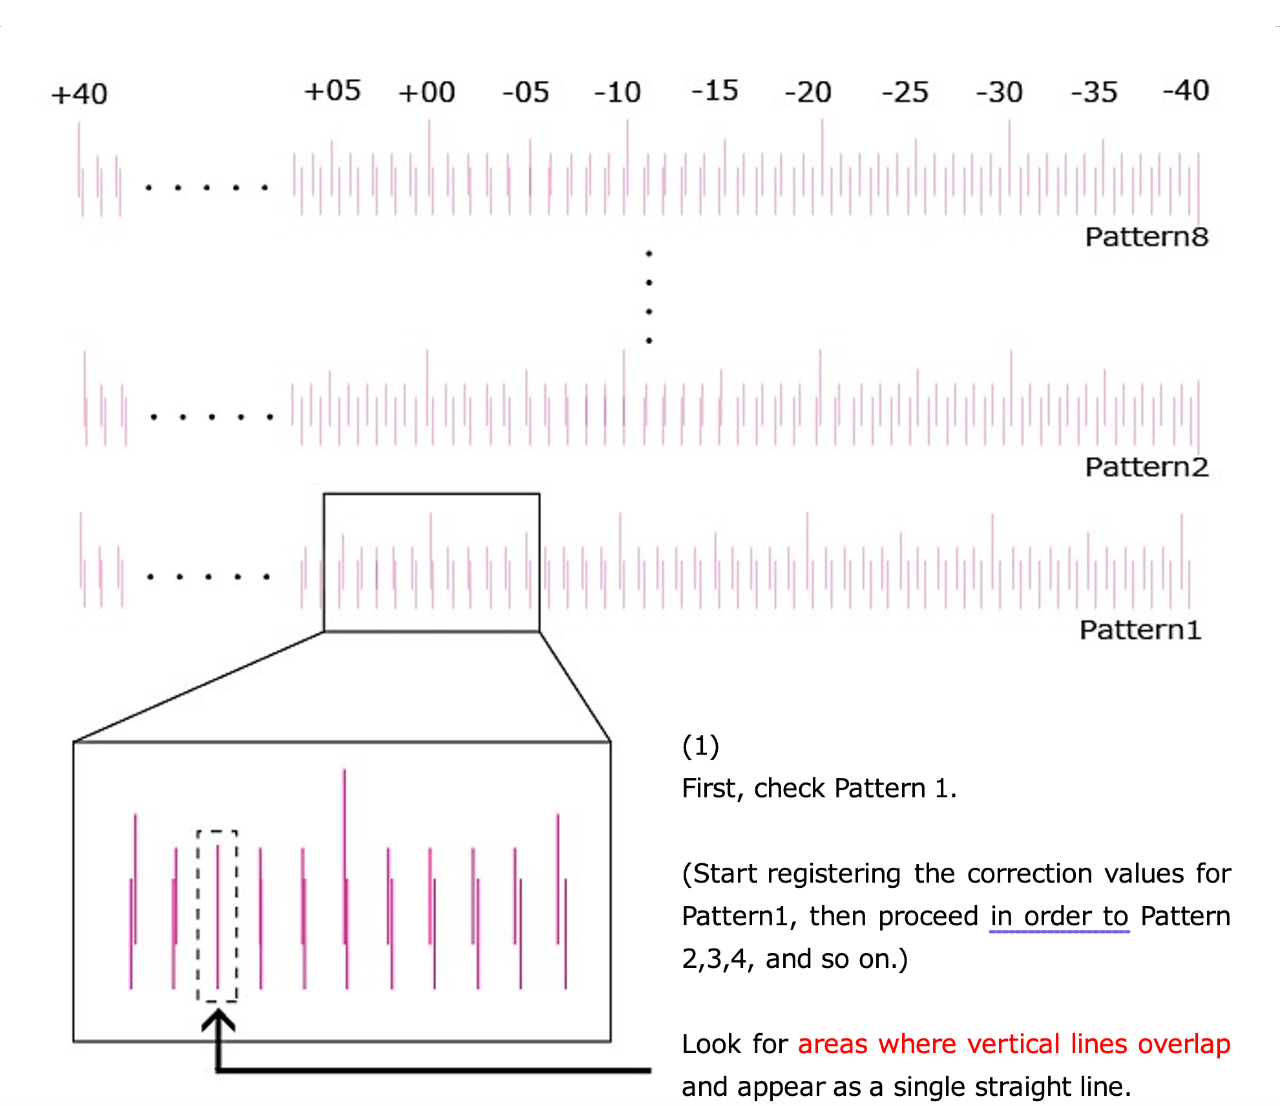
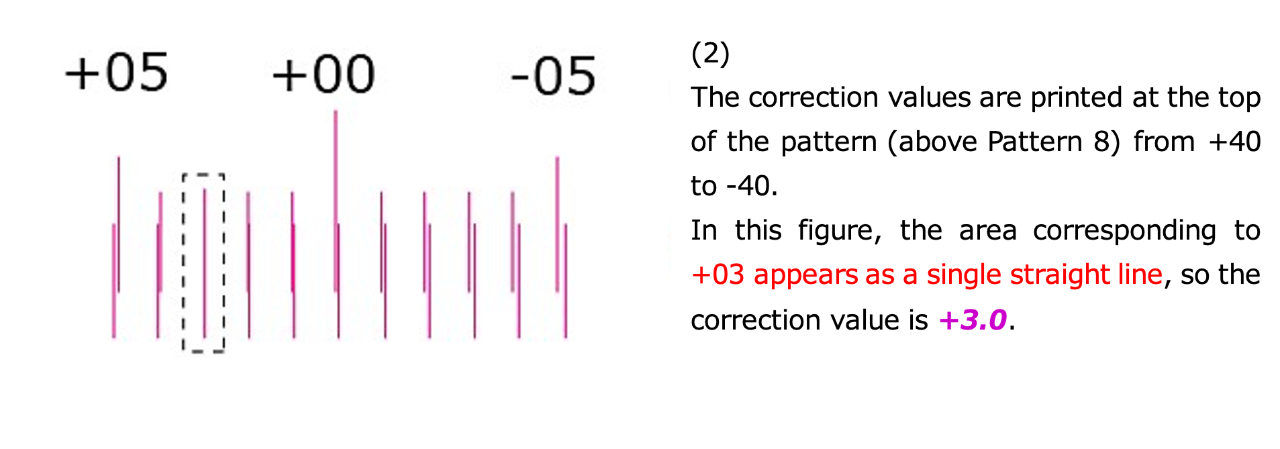
2. Check the correction value from the printed pattern.
* Refer to the figure below for the checking method.
3. Register the correction value.
(1) Press Up & Down keys to change the values and move to the next pattern by pressing ENTER.
(If you want to go back to the previous pattern, press END.)

(2) After registering the Pattern 8 and pressing ENTER will take you to the print start screen.
Press the END key several times to return to the LOCAL screen.
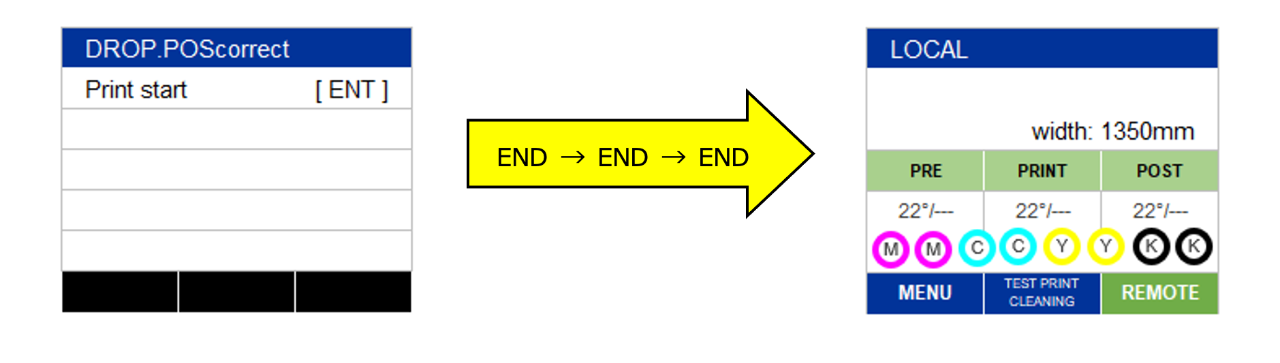
This concludes the DROP.POScorrect.
* The results of dot position adjustment will not be reflected in the printed patterns.
Print the data and confirm that the dot position misalignment has been improved.